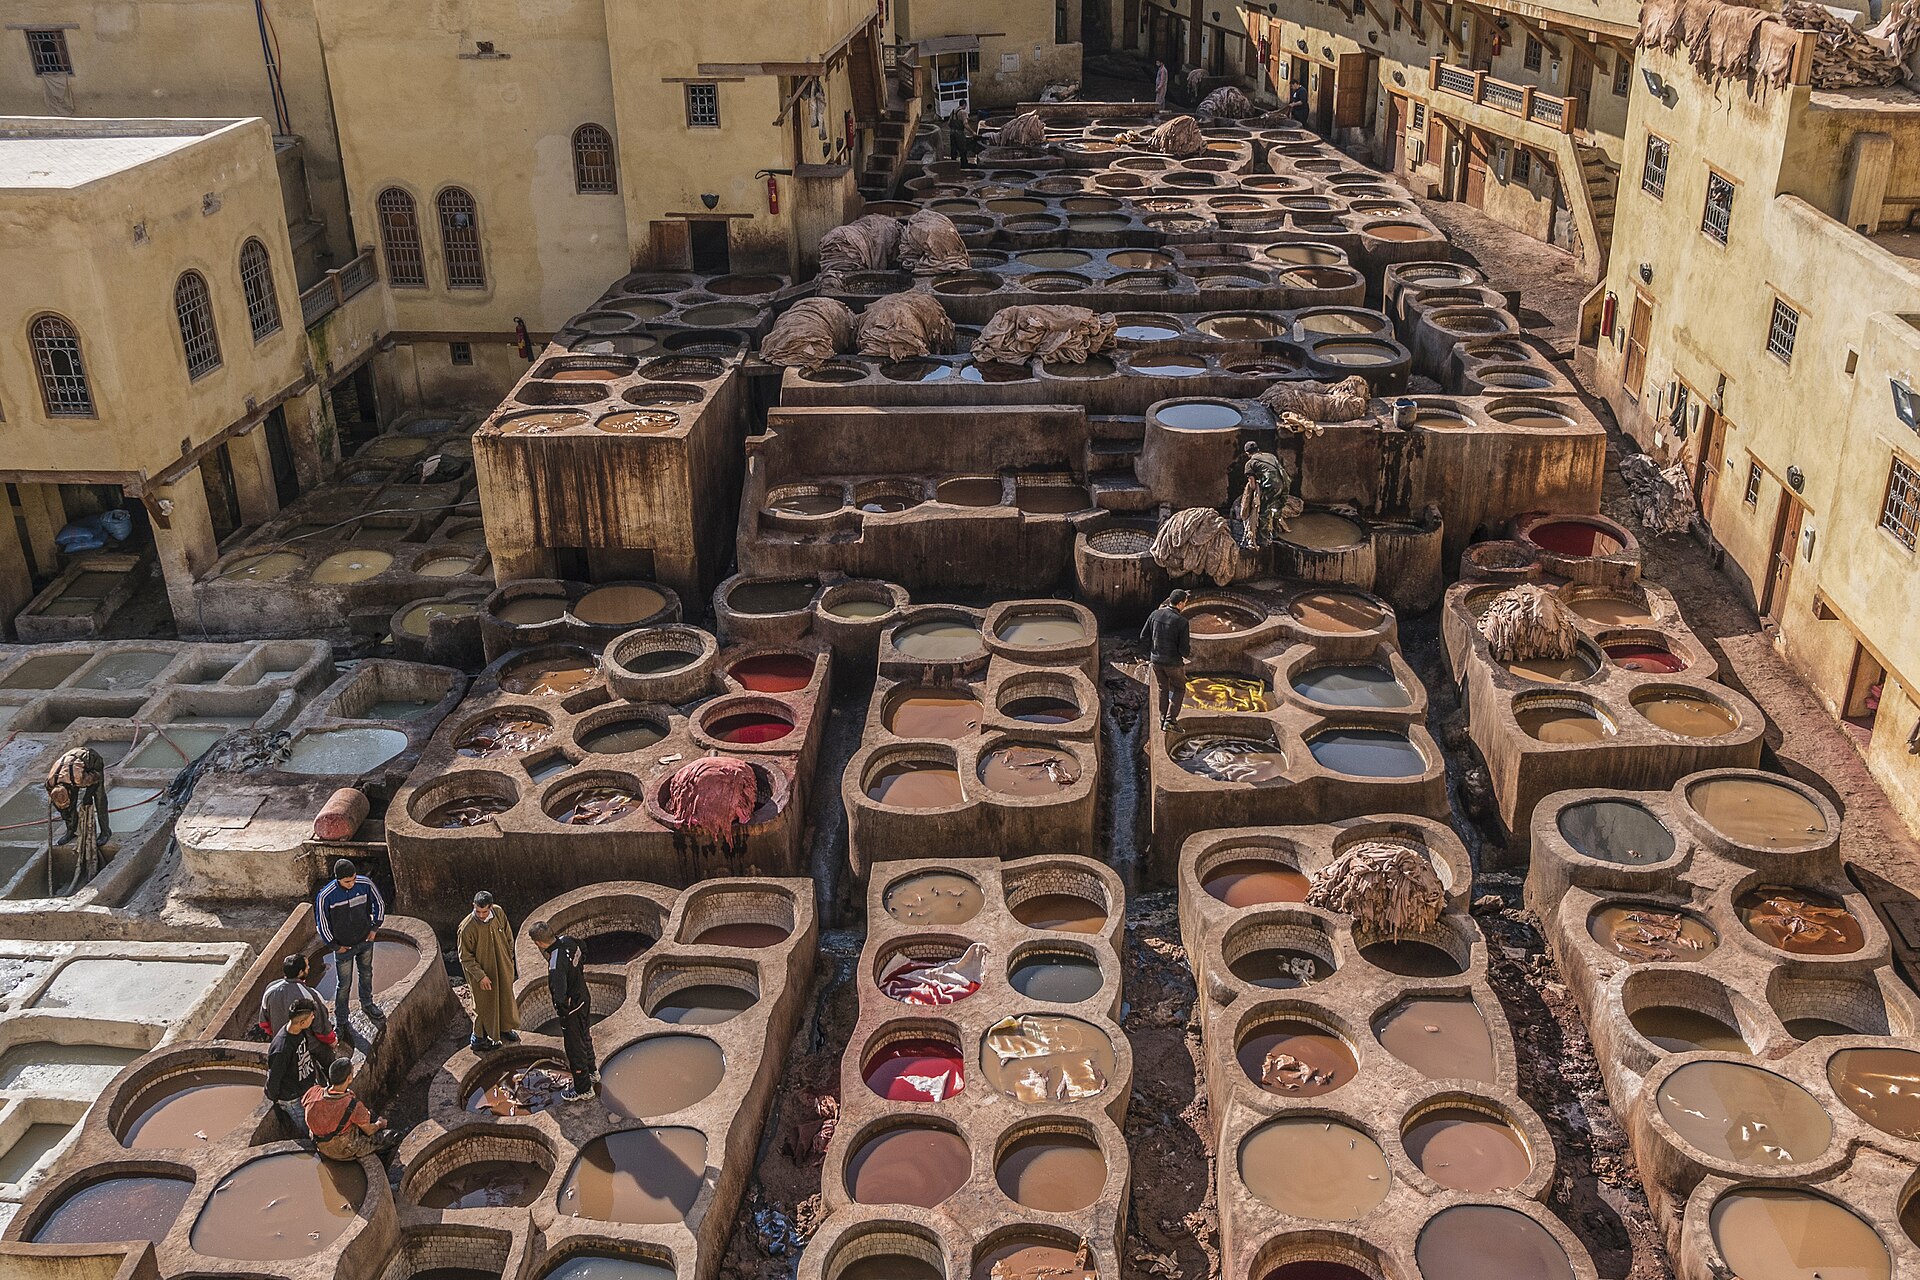

Fes leather has two very different visitor stories. One is the famous view over Chouara’s vats. The other happens at a workbench, where you cut, punch, stitch, stamp or bind a piece of leather. The first can explain production. The second can teach a transferable skill. A good page should never mix them up.
The quick decision map
| If you want to… | Look for… | Watch out for… |
|---|---|---|
| Understand tanning | A guided viewpoint with clear explanation of stages, materials and worker conditions | A shop terrace presented as a factory lesson |
| Make a leather object | A named artisan, workbench, tools, supervised practice and a realistic output | “Workshop” meaning a sales demonstration |
| Try tooling or stamping | Prepared leather, pattern practice and close tool guidance | No safety briefing or unclear leather source |
| Learn bookbinding | Folding, piercing, sewing and cover work matched to the time available | A ready-made notebook with only decoration added |
| Shop responsibly | Clear maker identity, material and price without pressure | Claims about quality or ethics with no evidence |
What you see at Chouara
Chouara is a working tannery area in the Fes medina. From nearby terraces, visitors can see hides moving through treatment and colouring stages. The view is visually powerful—and often surrounded by leather shops—but it is usually observation, not practical training.
A useful interpretation should explain what happens to the hide, which steps occur in the vats, how drying and finishing work, and what health and environmental questions come with tanning. A sprig of mint for the smell is not a curriculum.
Never enter a production area simply because someone waves you forward. Active tanneries contain wet surfaces, chemicals, heavy materials and work zones. Access should be authorised and safely managed.
Tanning and leather craft are different skills
Tanning turns raw hide into usable leather. Leather craft turns prepared leather into objects. A beginner workshop is much more likely to teach the second.
Depending on the session, you may practise:
- choosing a suitable piece of leather;
- tracing or cutting a simple pattern;
- punching stitch holes;
- saddle stitching;
- stamping or tooling a motif;
- edge finishing;
- folding and binding a notebook;
- assembling a small purse, tag, bracelet or cover.
Ask whether the leather is prepared before the class and which stages you will complete. Using prepared material is sensible; hiding that fact is not.
What can fit into two or three hours?
A short class should choose a modest object and leave time for correction. A luggage tag, bracelet, card holder or simple journal cover can be realistic. A fully lined bag made from scratch probably is not.
The best sessions let you test the tool on a scrap first. Your first stamped line may wander like a taxi in the medina; that is why the artisan is there. A small correction loop is more valuable than a large object mostly finished by someone else.
For bookbinding, ask which parts are real: paper folding, hole punching, sewing, attaching the cover and finishing. For tooling, ask whether the motif is freehand, transferred or made with a stamp.
Materials, safety and access
Leather work uses sharp punches, awls, knives, needles and hammers. Confirm age limits, supervision, protective equipment and tool substitutions for children. Adhesives, dyes and finishes should be named, especially if you have sensitivities.
Traditional medina workshops may be upstairs, narrow or arranged around low benches. Ask about the whole route—not only whether a doorway is wide. Seating, work height, toilets and the nearest vehicle drop-off all affect whether the class is comfortable.
If material choice matters to you, ask about the animal source, tanning method and whether synthetic finishes are used. Do not infer “vegetable tanned,” “natural” or “ethical” from colour and smell.
How to recognise a real class
A genuine learning session can answer five questions without dancing around them:
- Who is the artisan?
- Which tool will you use?
- What will you make?
- Which parts are already prepared?
- How much time will your own hands spend working?
A tannery viewpoint, artisan visit and practical class can all be worthwhile. Labelled honestly, they even work beautifully together: first understand where the material comes from, then sit at a bench and learn what it can become.
Tannery interpretation and bench work need different plans
A tannery visit is usually about process, labour, place and material transformation. A bench workshop is about controlling tools and making an object. Combining them can be powerful, but the timetable should protect both rather than rushing through the tannery so the group can reach a shop.
For the tannery, ask who explains the process and where visitors stand. The guide should identify what can be observed safely, which substances are present and where photography is permitted. Strong smells, stairs, sun and exposed viewpoints affect comfort and access. A sprig of mint may help some visitors; it does not replace honest warning or a shorter route.
For the bench session, confirm the separate address, artisan, object and tools. The leather may come from a tannery without the class taking place there. That distinction helps search engines, travellers and—most importantly—the person who must find the correct door in the medina.
Choose the object by the learning goal
A stamped tag teaches tool placement and pressure. A stitched card holder adds hole spacing, thread path and edge alignment. A journal cover can combine cutting, folding, attachment and finishing. Bigger is not automatically better; a smaller object often leaves more time to practise on scrap and correct the final piece.
Ask whether you will choose the design, trace it, cut it or work from a prepared blank. Prepared parts can keep a short workshop realistic. The provider should simply say which decisions remain yours.
If a piece needs glue or finish to cure, ask how it will be packed. Fresh surface treatment beside clothing, documents and a warm suitcase is an adventure nobody requested.
Care after the workshop
The artisan should explain how to store and clean the finished piece, whether colour may transfer and how moisture or sun affects it. If the leather has a strong finish or dye, let it air as advised before packing.
Keep the maker’s name and workshop details with the object when permission is given. That turns the souvenir into a record of a real learning exchange rather than a generic “handmade in Morocco” story that loses the artisan on the way home.
Build a richer Fes route
Use the full Fes learning guide to plan your day. Compare leather craft courses with zellige and pottery, weaving, metal engraving and Arabic calligraphy. The medina glossary helps with the geography before you go.
Return to the Morocco learning hub to compare Fes craft depth with Tetouan, Marrakech or another city.
Enquire with the useful details
Tell GoLearnTo whether you want tannery interpretation, leather making, tooling or bookbinding. Add your dates, ages, experience level, preferred object, access needs and material concerns. We can then check whether the listing offers actual bench time—or only a very persuasive walk through a shop.
Evidence
Selected references
Official and institutional references used for place, heritage or practical context. Commercial operators and marketplaces are kept in our private research ledger rather than promoted here. Reviewed 14 August 2026.